
Keycloak is an open-source identity and access management solution designed to manage users and secure applications. It provides features such as single sign-on (SSO), social login integration, and user federation.
It also offers a user-friendly administration console for managing users, roles, and permissions, as well as customizable user interfaces for login, registration, and account management
Why use a local auth server?
Being able to run a local auth server means we won’t find ourselves blocked while waiting for a client to configure their own auth server. Often picking up a piece of work involving client-owned authentication results in some delays while requests are sent around, and more often than not leaves us unable to write our application code until the auth server has been configured.
It also allows us to have full control over our own local dev environment, including the ability to create any number of users with specific roles. This means we can easily run multi-user scenarios locally for testing, demoes or debugging, and prevents needing to comment out or tweak application code just to replicate a bug.
Getting started
To start the Keycloak dev server, simply run the following command in your terminal. This will expose Keycloak on port 8080, and creates an initial admin user with the credentials admin:admin.
docker run -p 8080:8080 -e KEYCLOAK_ADMIN=admin -e KEYCLOAK_ADMIN_PASSWORD=admin quay.io/keycloak/keycloak:25.0.2 start-dev
Opening http://localhost:8080/ in your browser should show you the login page for the Keycloak admin interface. Sign in with the previously created admin credentials admin:admin. Once logged in, you should be greeted with the Keycloak admin console.
Configuring Keycloak
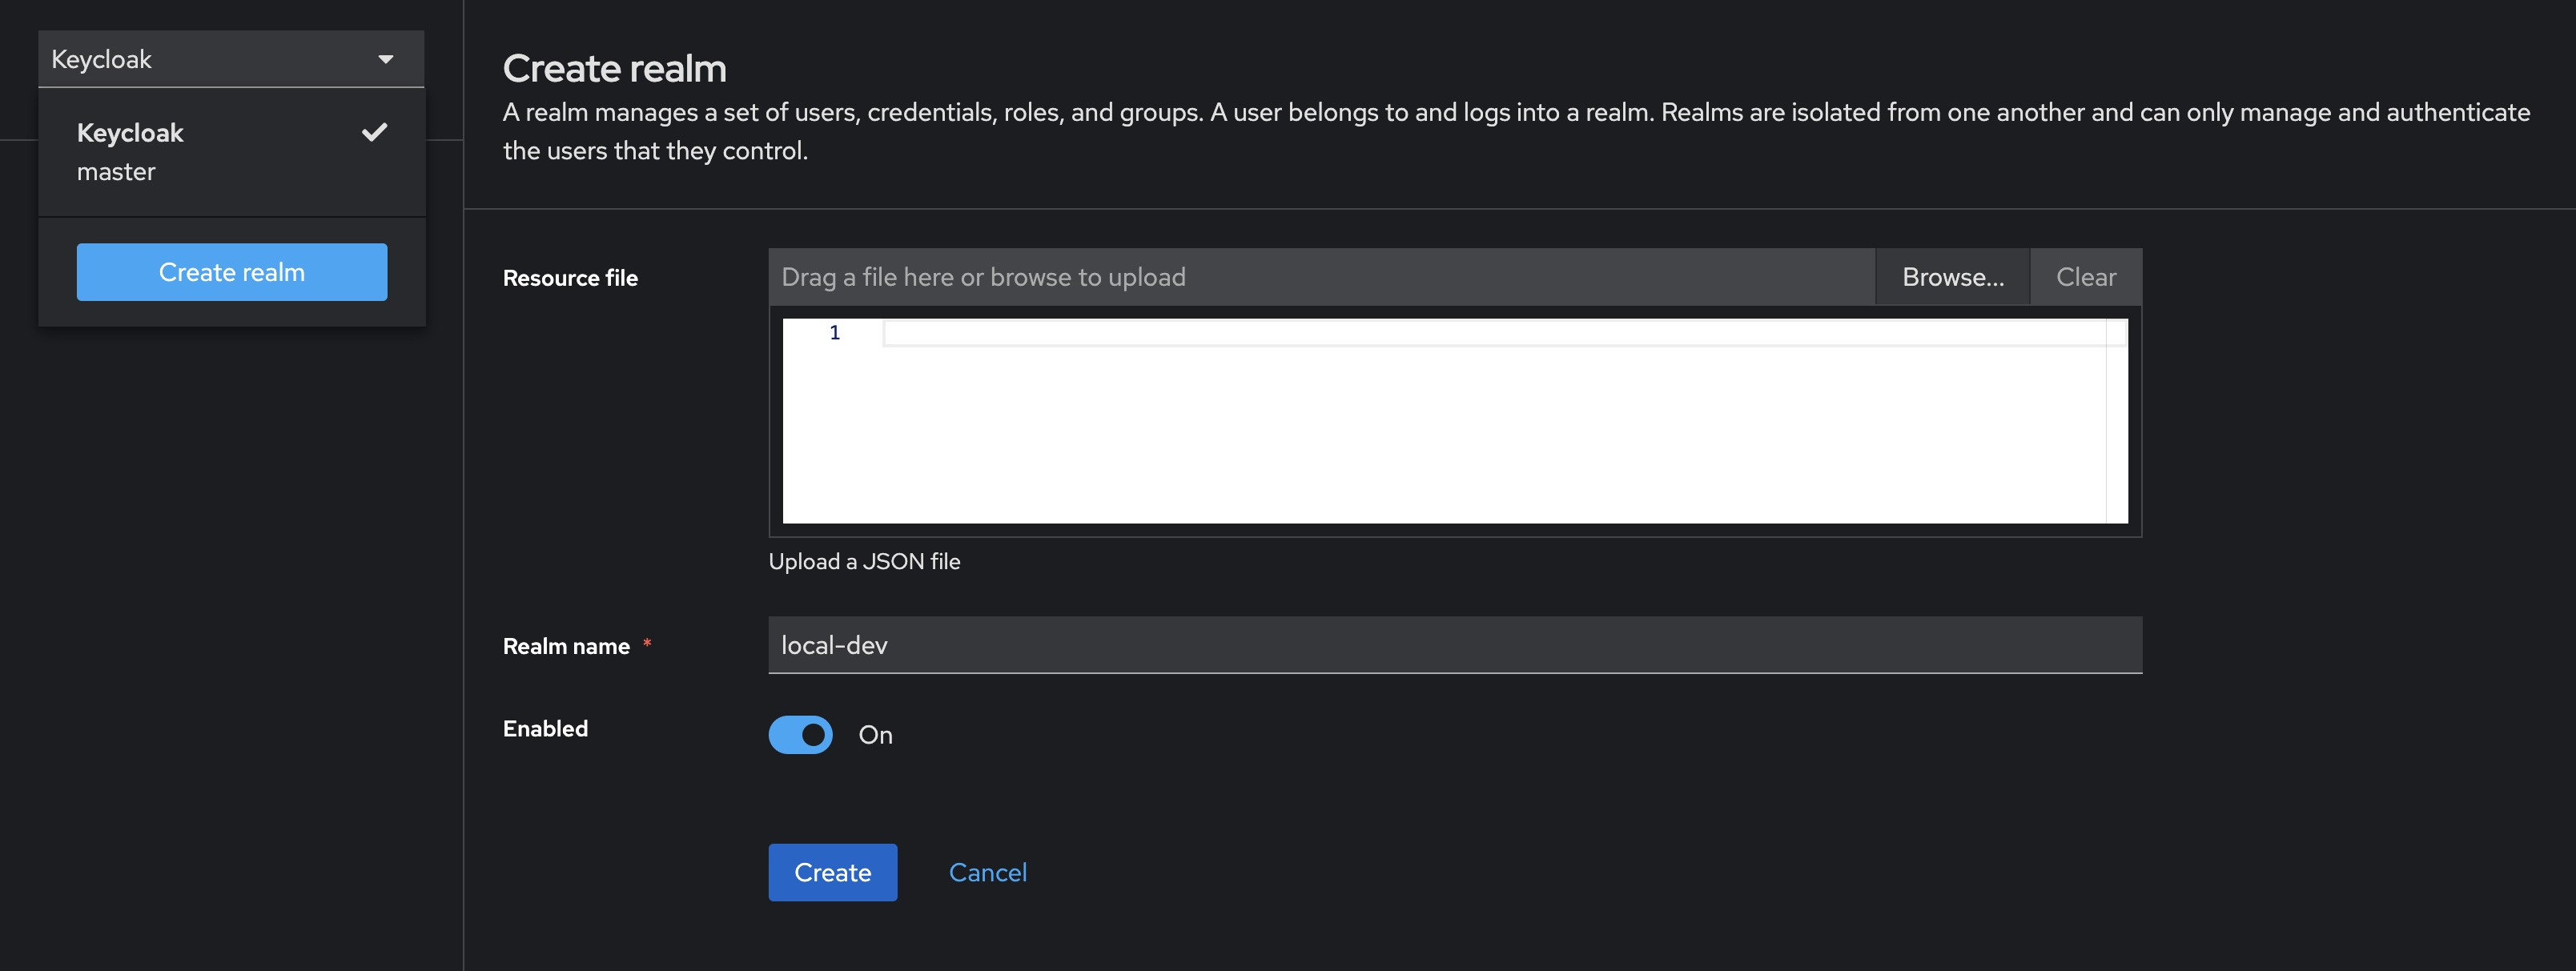
Creating a realm
- Open the admin console and login using our admin credentials
admin:admin - Open the dropdown that currently says Keycloak and select Create realm
- Enter the desired name for the realm, in this case using
local-dev - Finish creating the realm by clicking the “Create” button
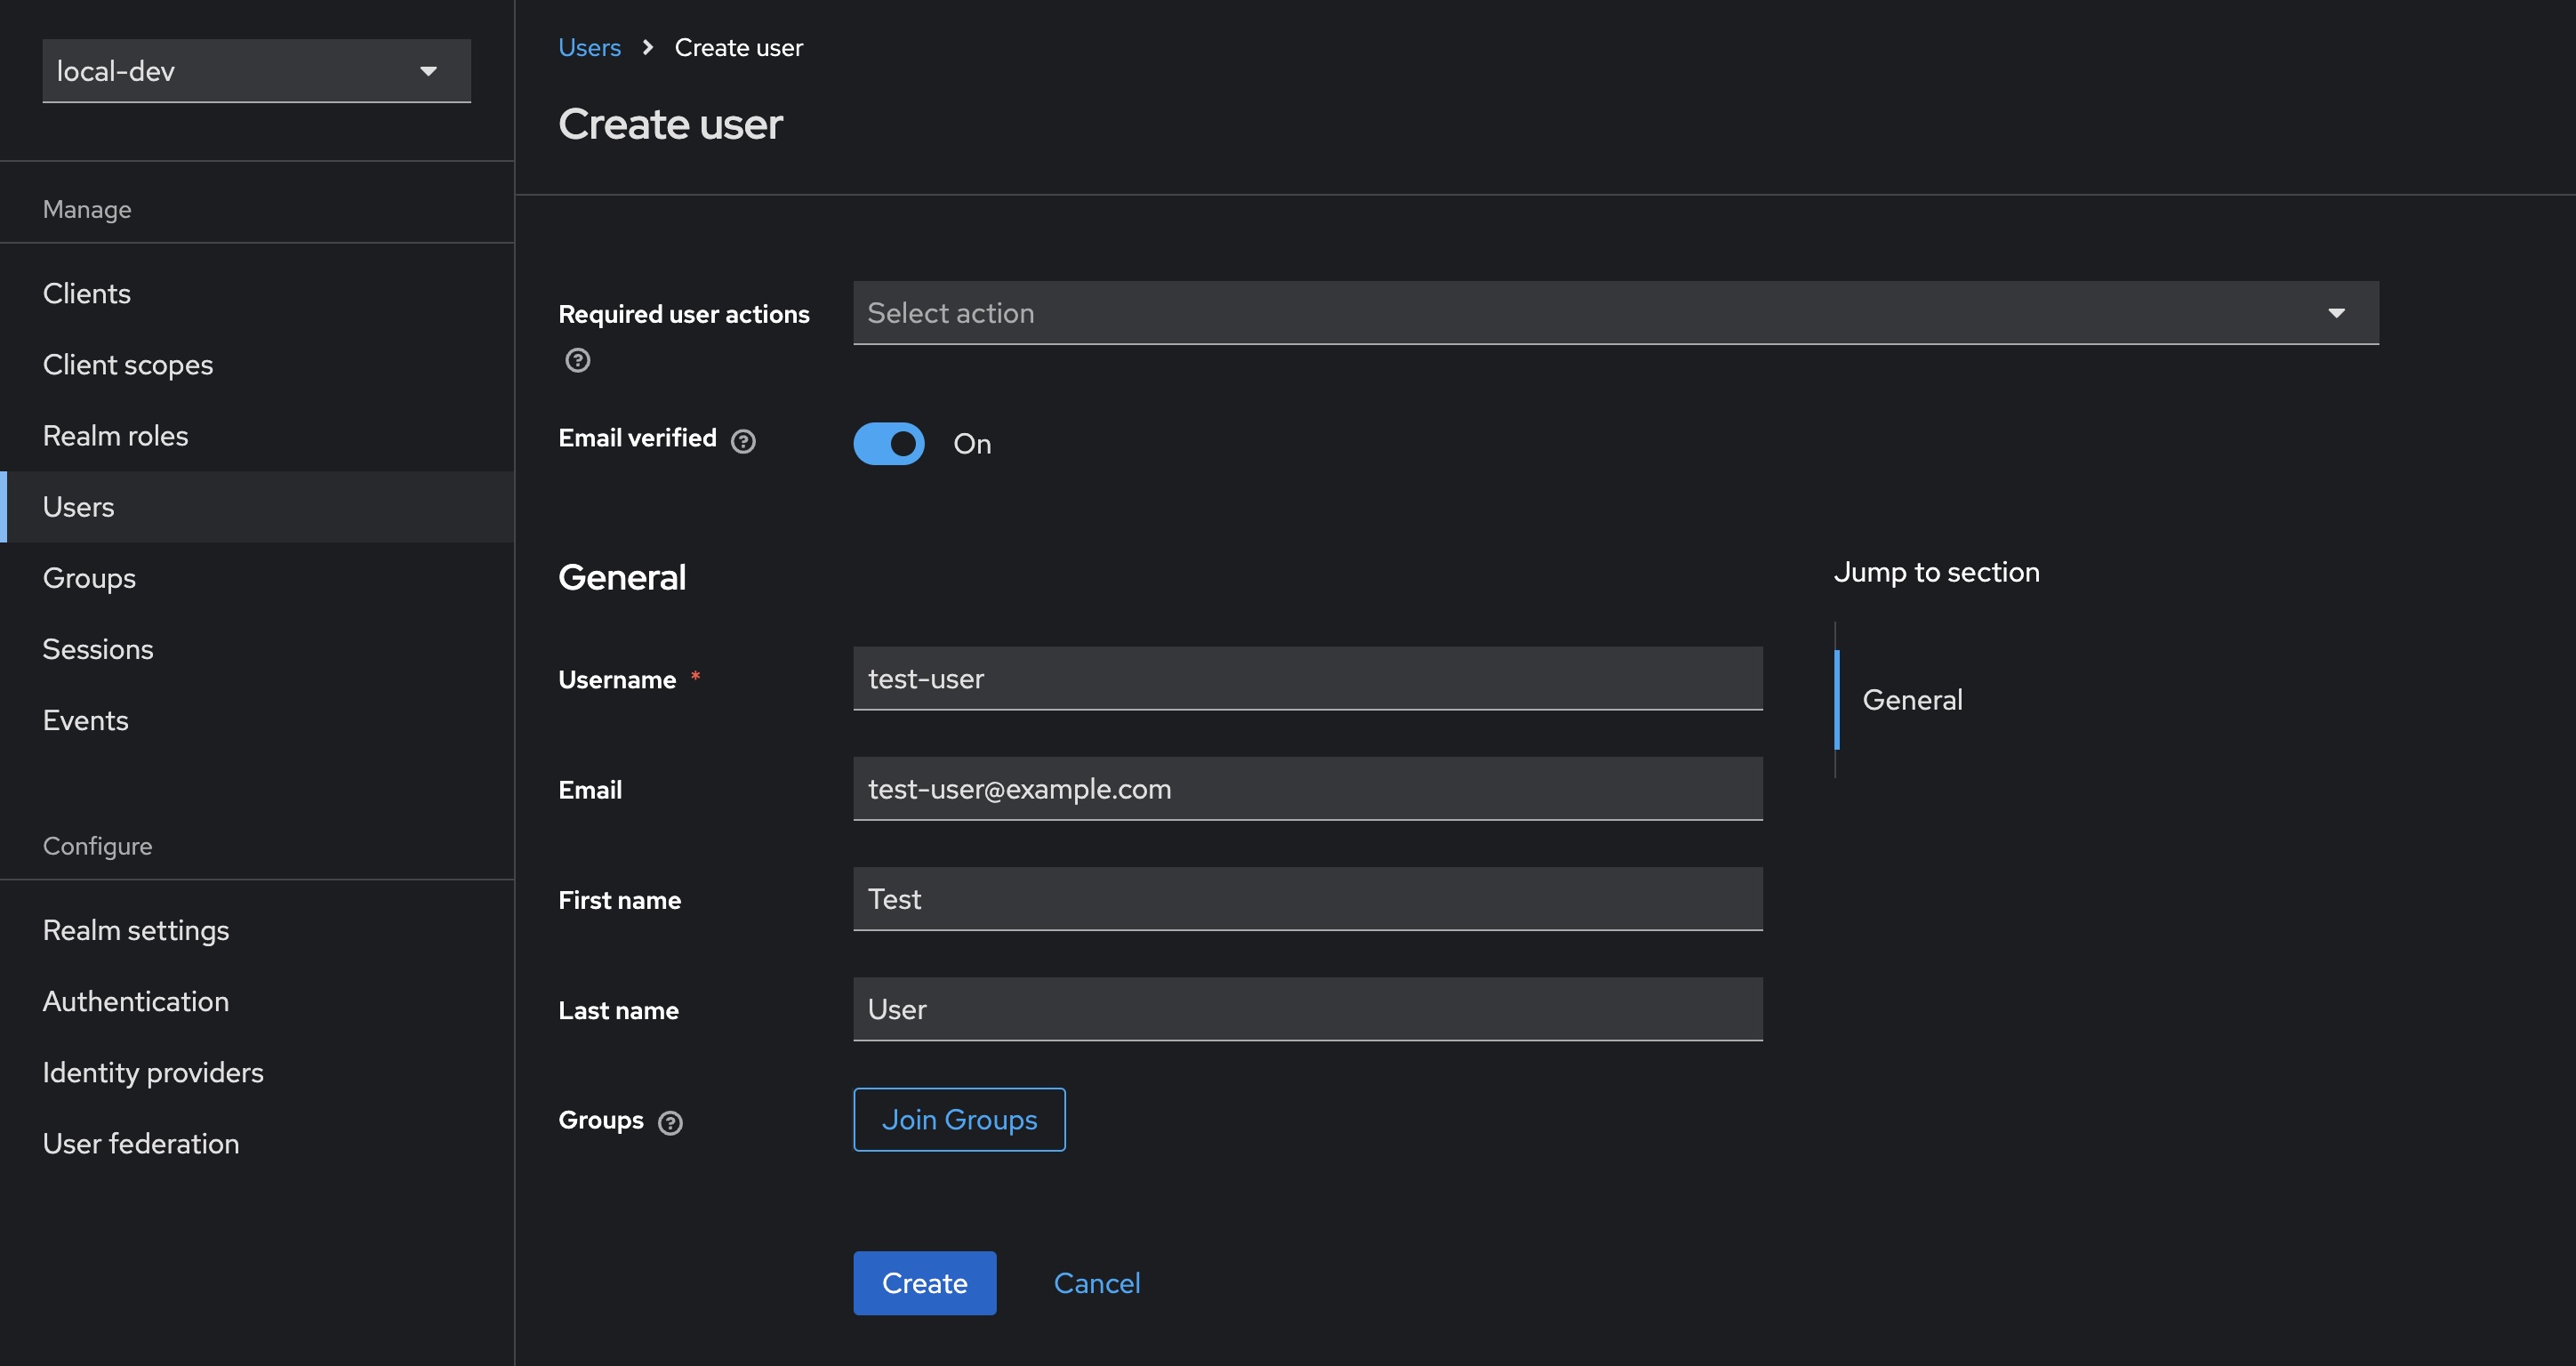
Adding a user
- Select Users from the sidebar, then click Create new user
- Fill in the details for a new user, in this case using
test-useras the username - (Optional) ticking Email verified means our test user can skip this step
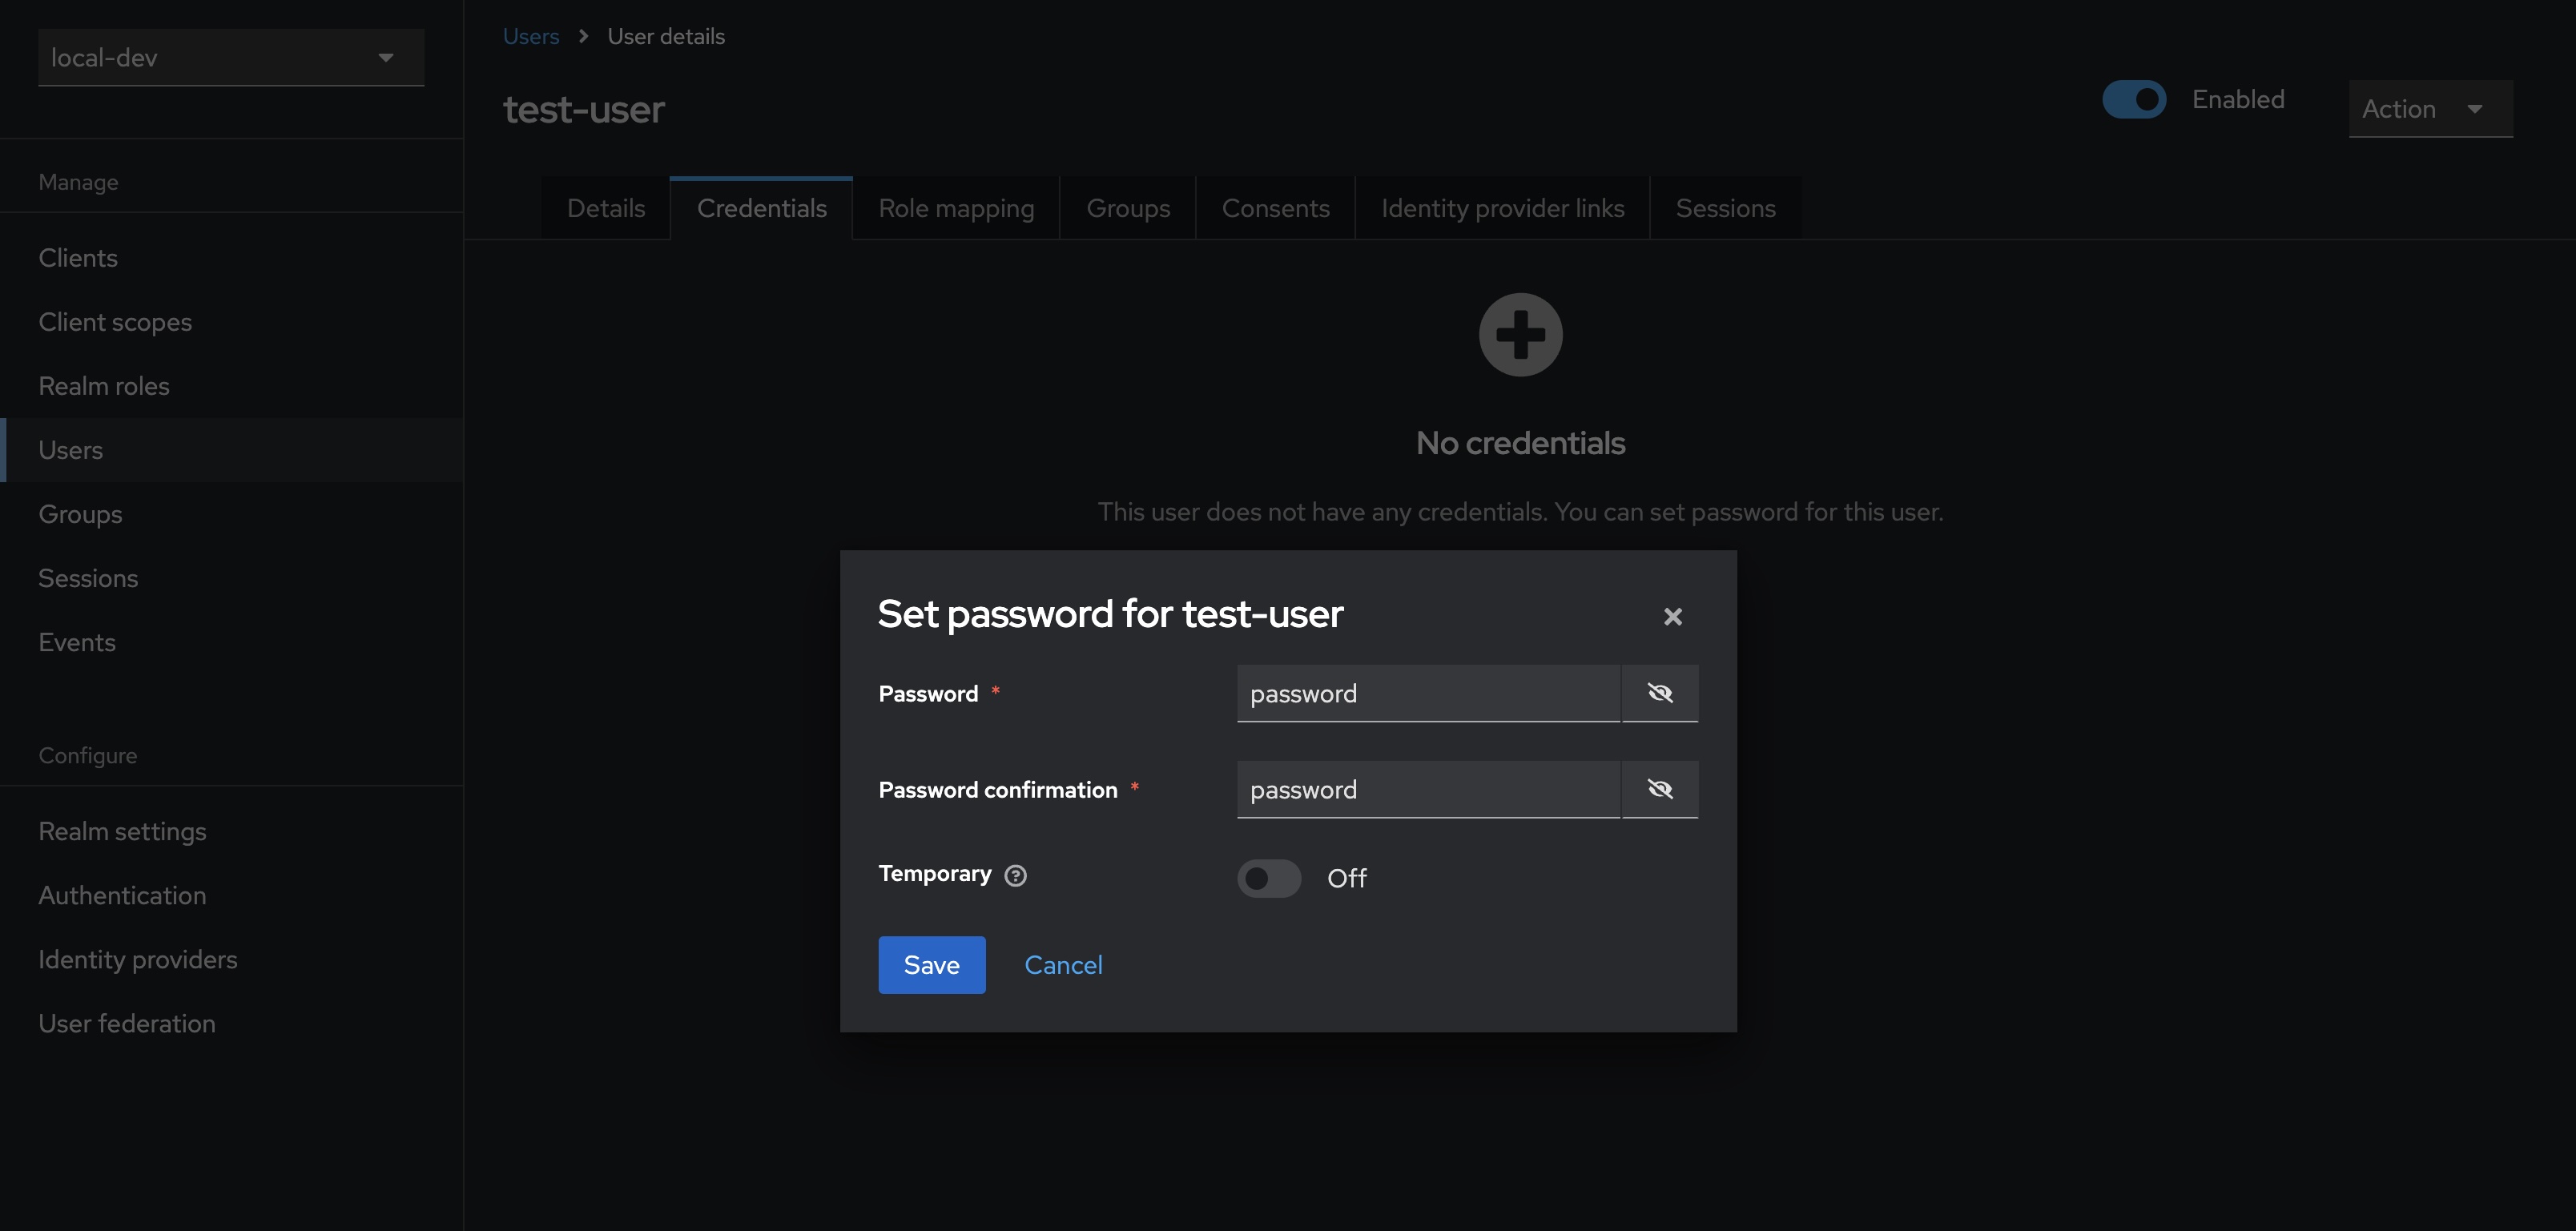
- Select Credentials from the tab bar, then click Set password
- Enter and confirm the user’s password, in this case using
password - (Optional) uncheck Temporary to prevent needing to update the password at first login for this user
You can test the newly created user’s account at http://localhost:8080/realms/myrealm/account. Opening the link and signing in with our user’s credentials test-user:password gives us access to a user-facing interface that allows updating of details, passwords, and the setting up of two-factor authentication.
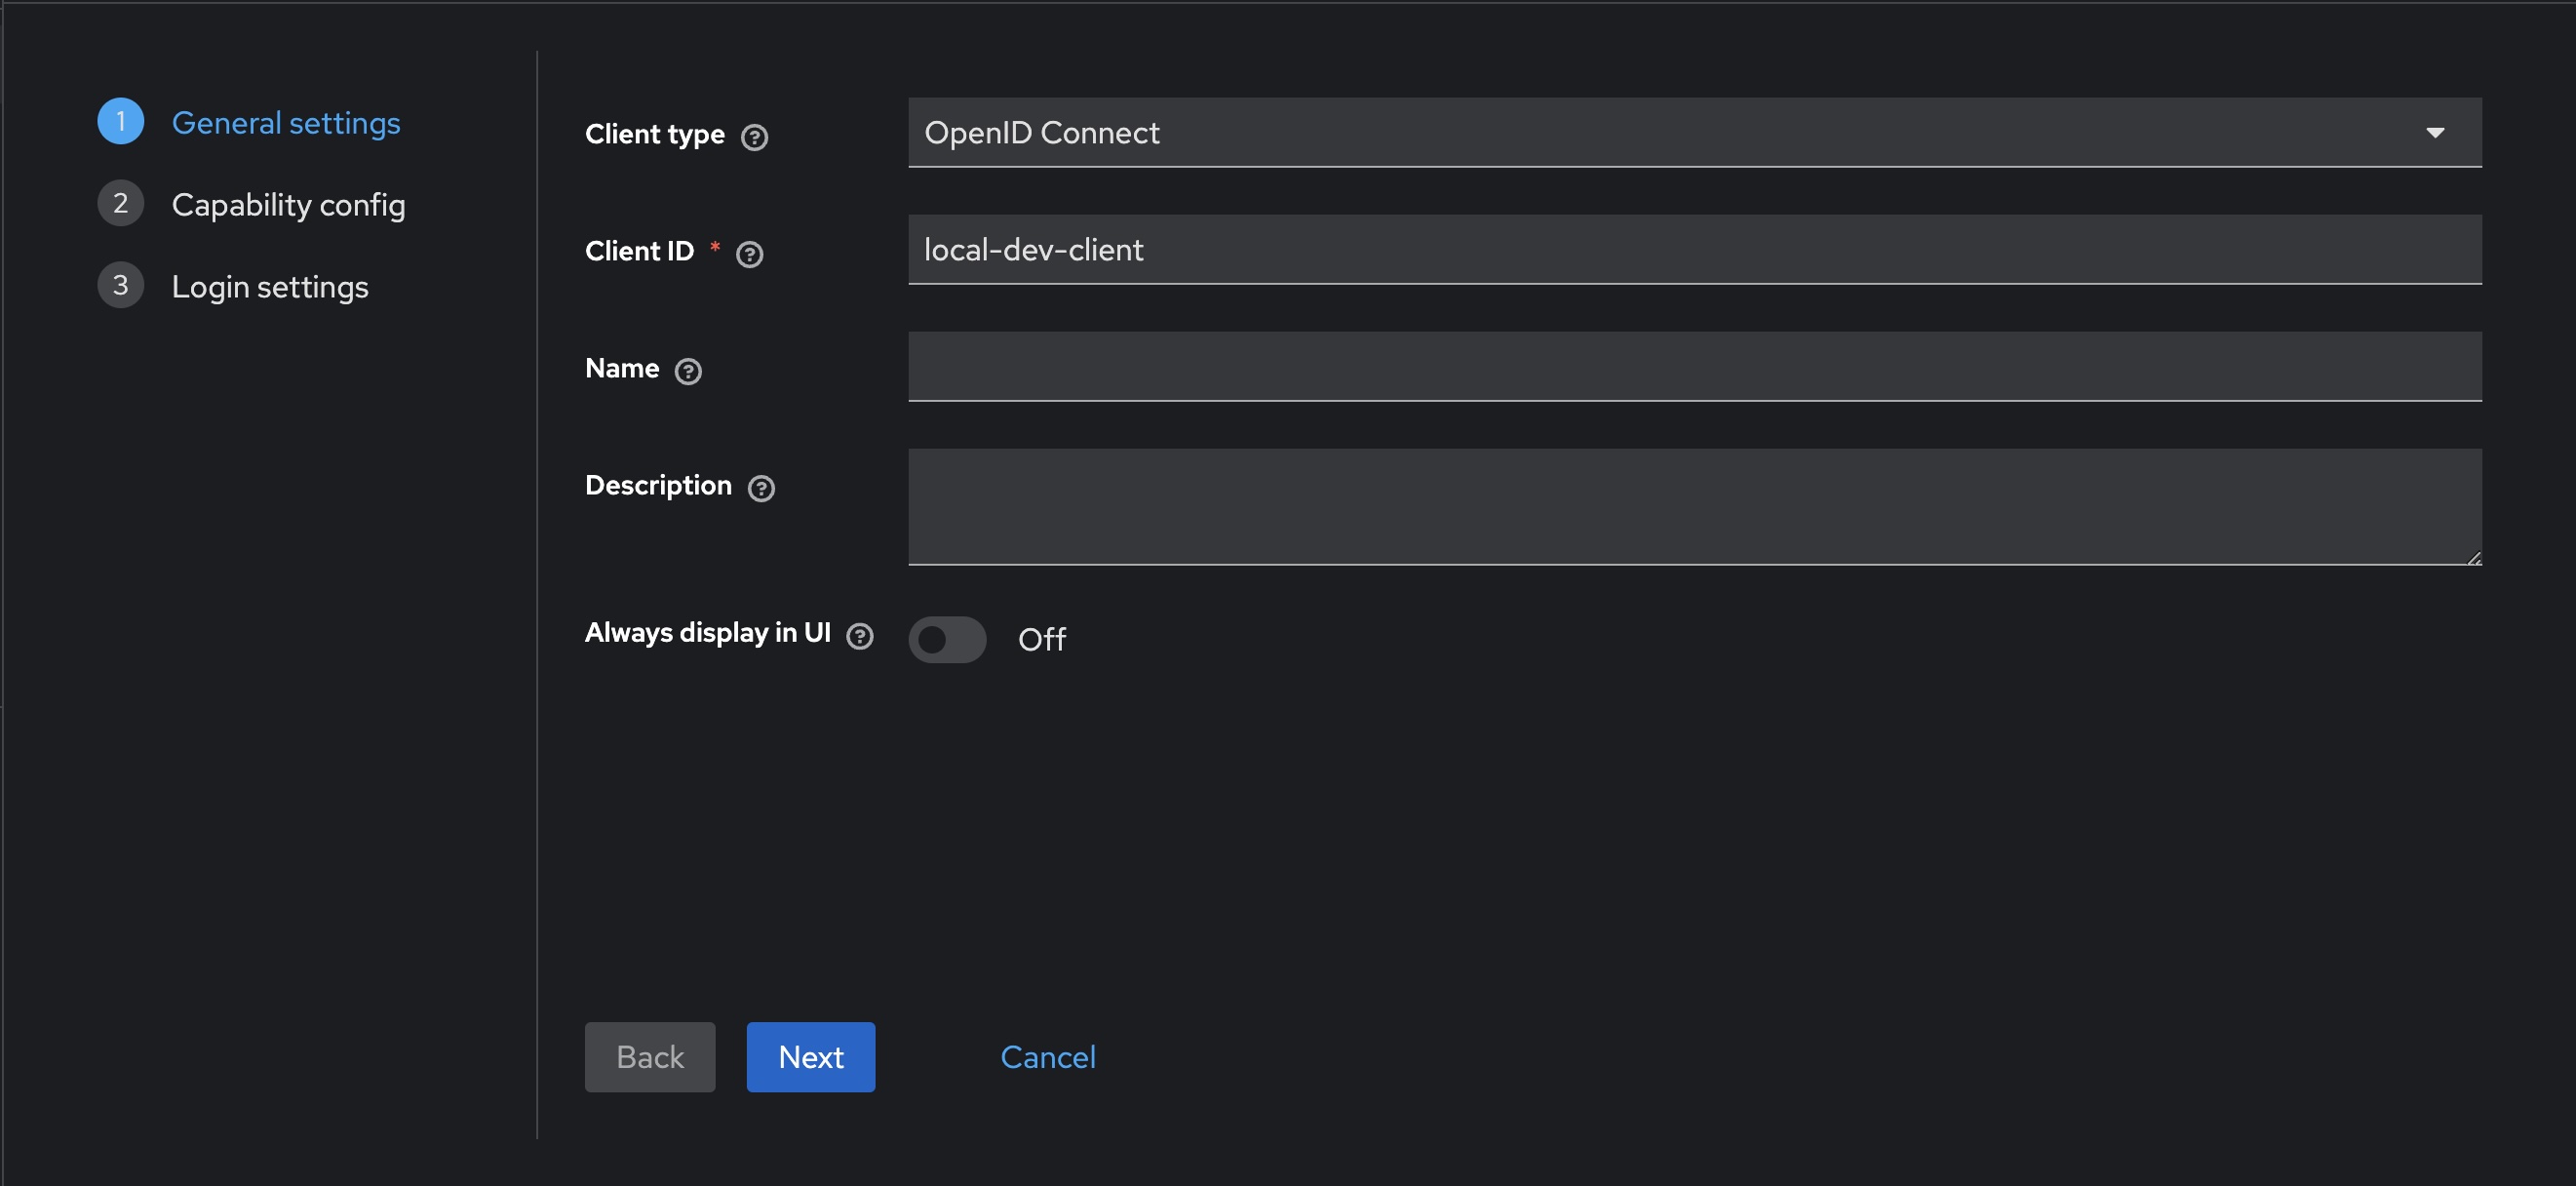
Registering a client
- Select Clients in the sidebar, then click Create client
- Make sure to leave
OpenID Connectselected as the Client type - Enter the desired client name, in this case using
local-dev-client - Click Next
- Ensure that Standard flow remains checked
- Click Next
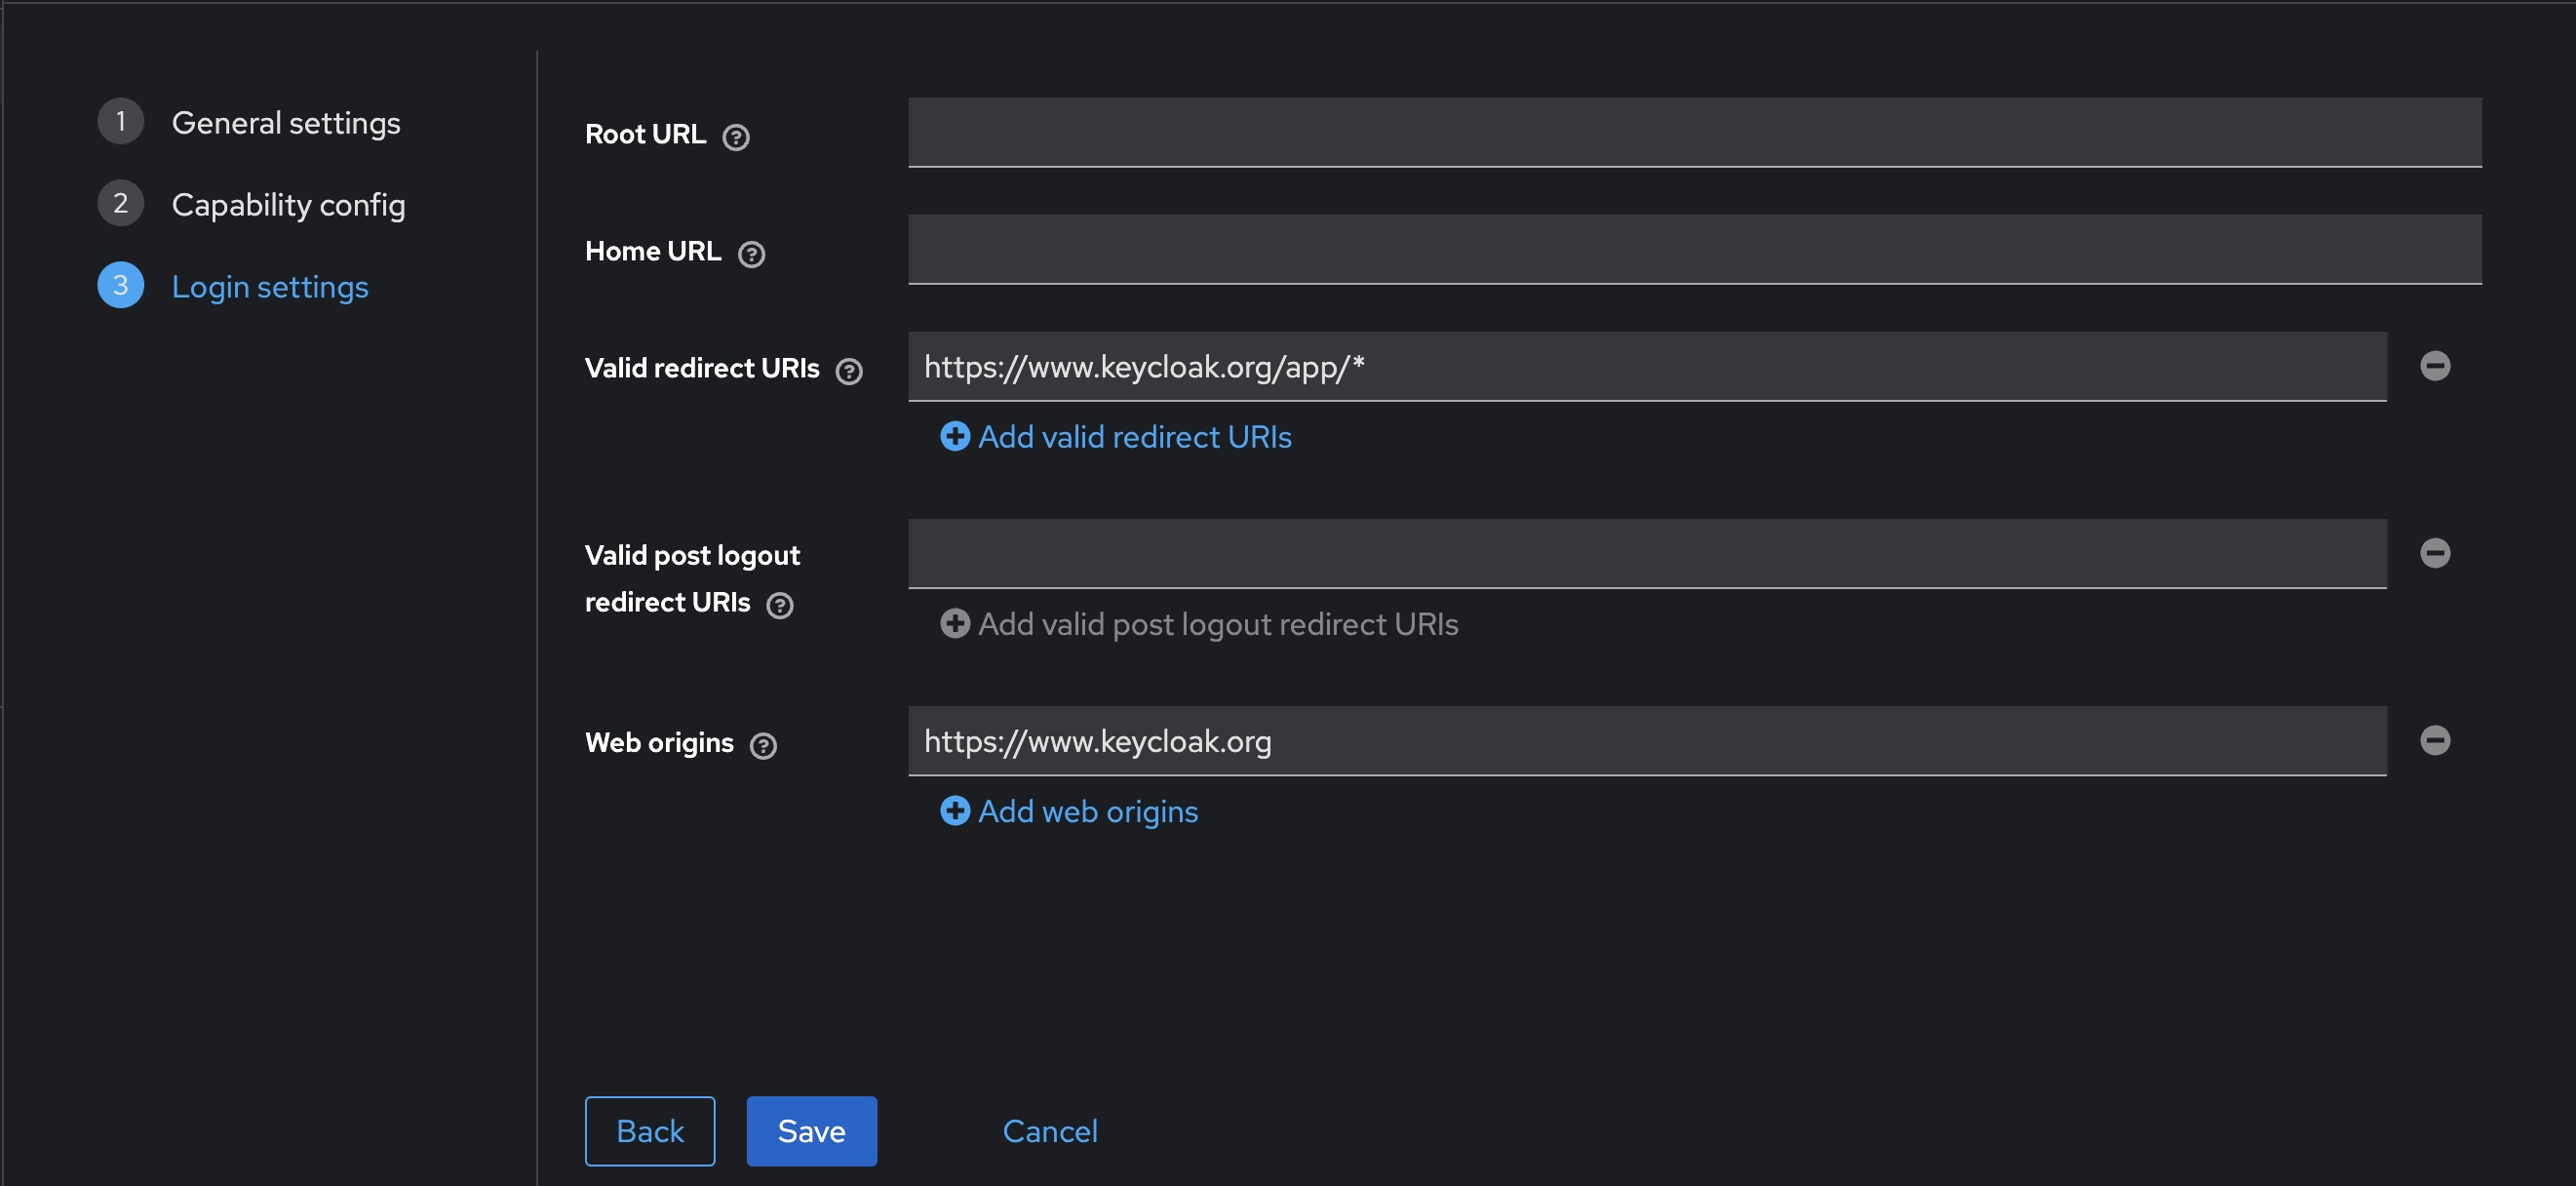
- To facilitate testing, make the following changes to the Login settings
- Set Valid redirect URIs to
https://www.keycloak.org/app/* - Set Web origins to
https://www.keycloak.org
- Set Valid redirect URIs to
- Click Save
You can test the newly created client by using https://www.keycloak.org/app/. Enter the details from our previously created realm and client, and press Save. Once saved, you can sign in with the test user created earlier.
Audience claim
You may also need to set the audience claim correctly, which might become apparent when wiring this up to an application.
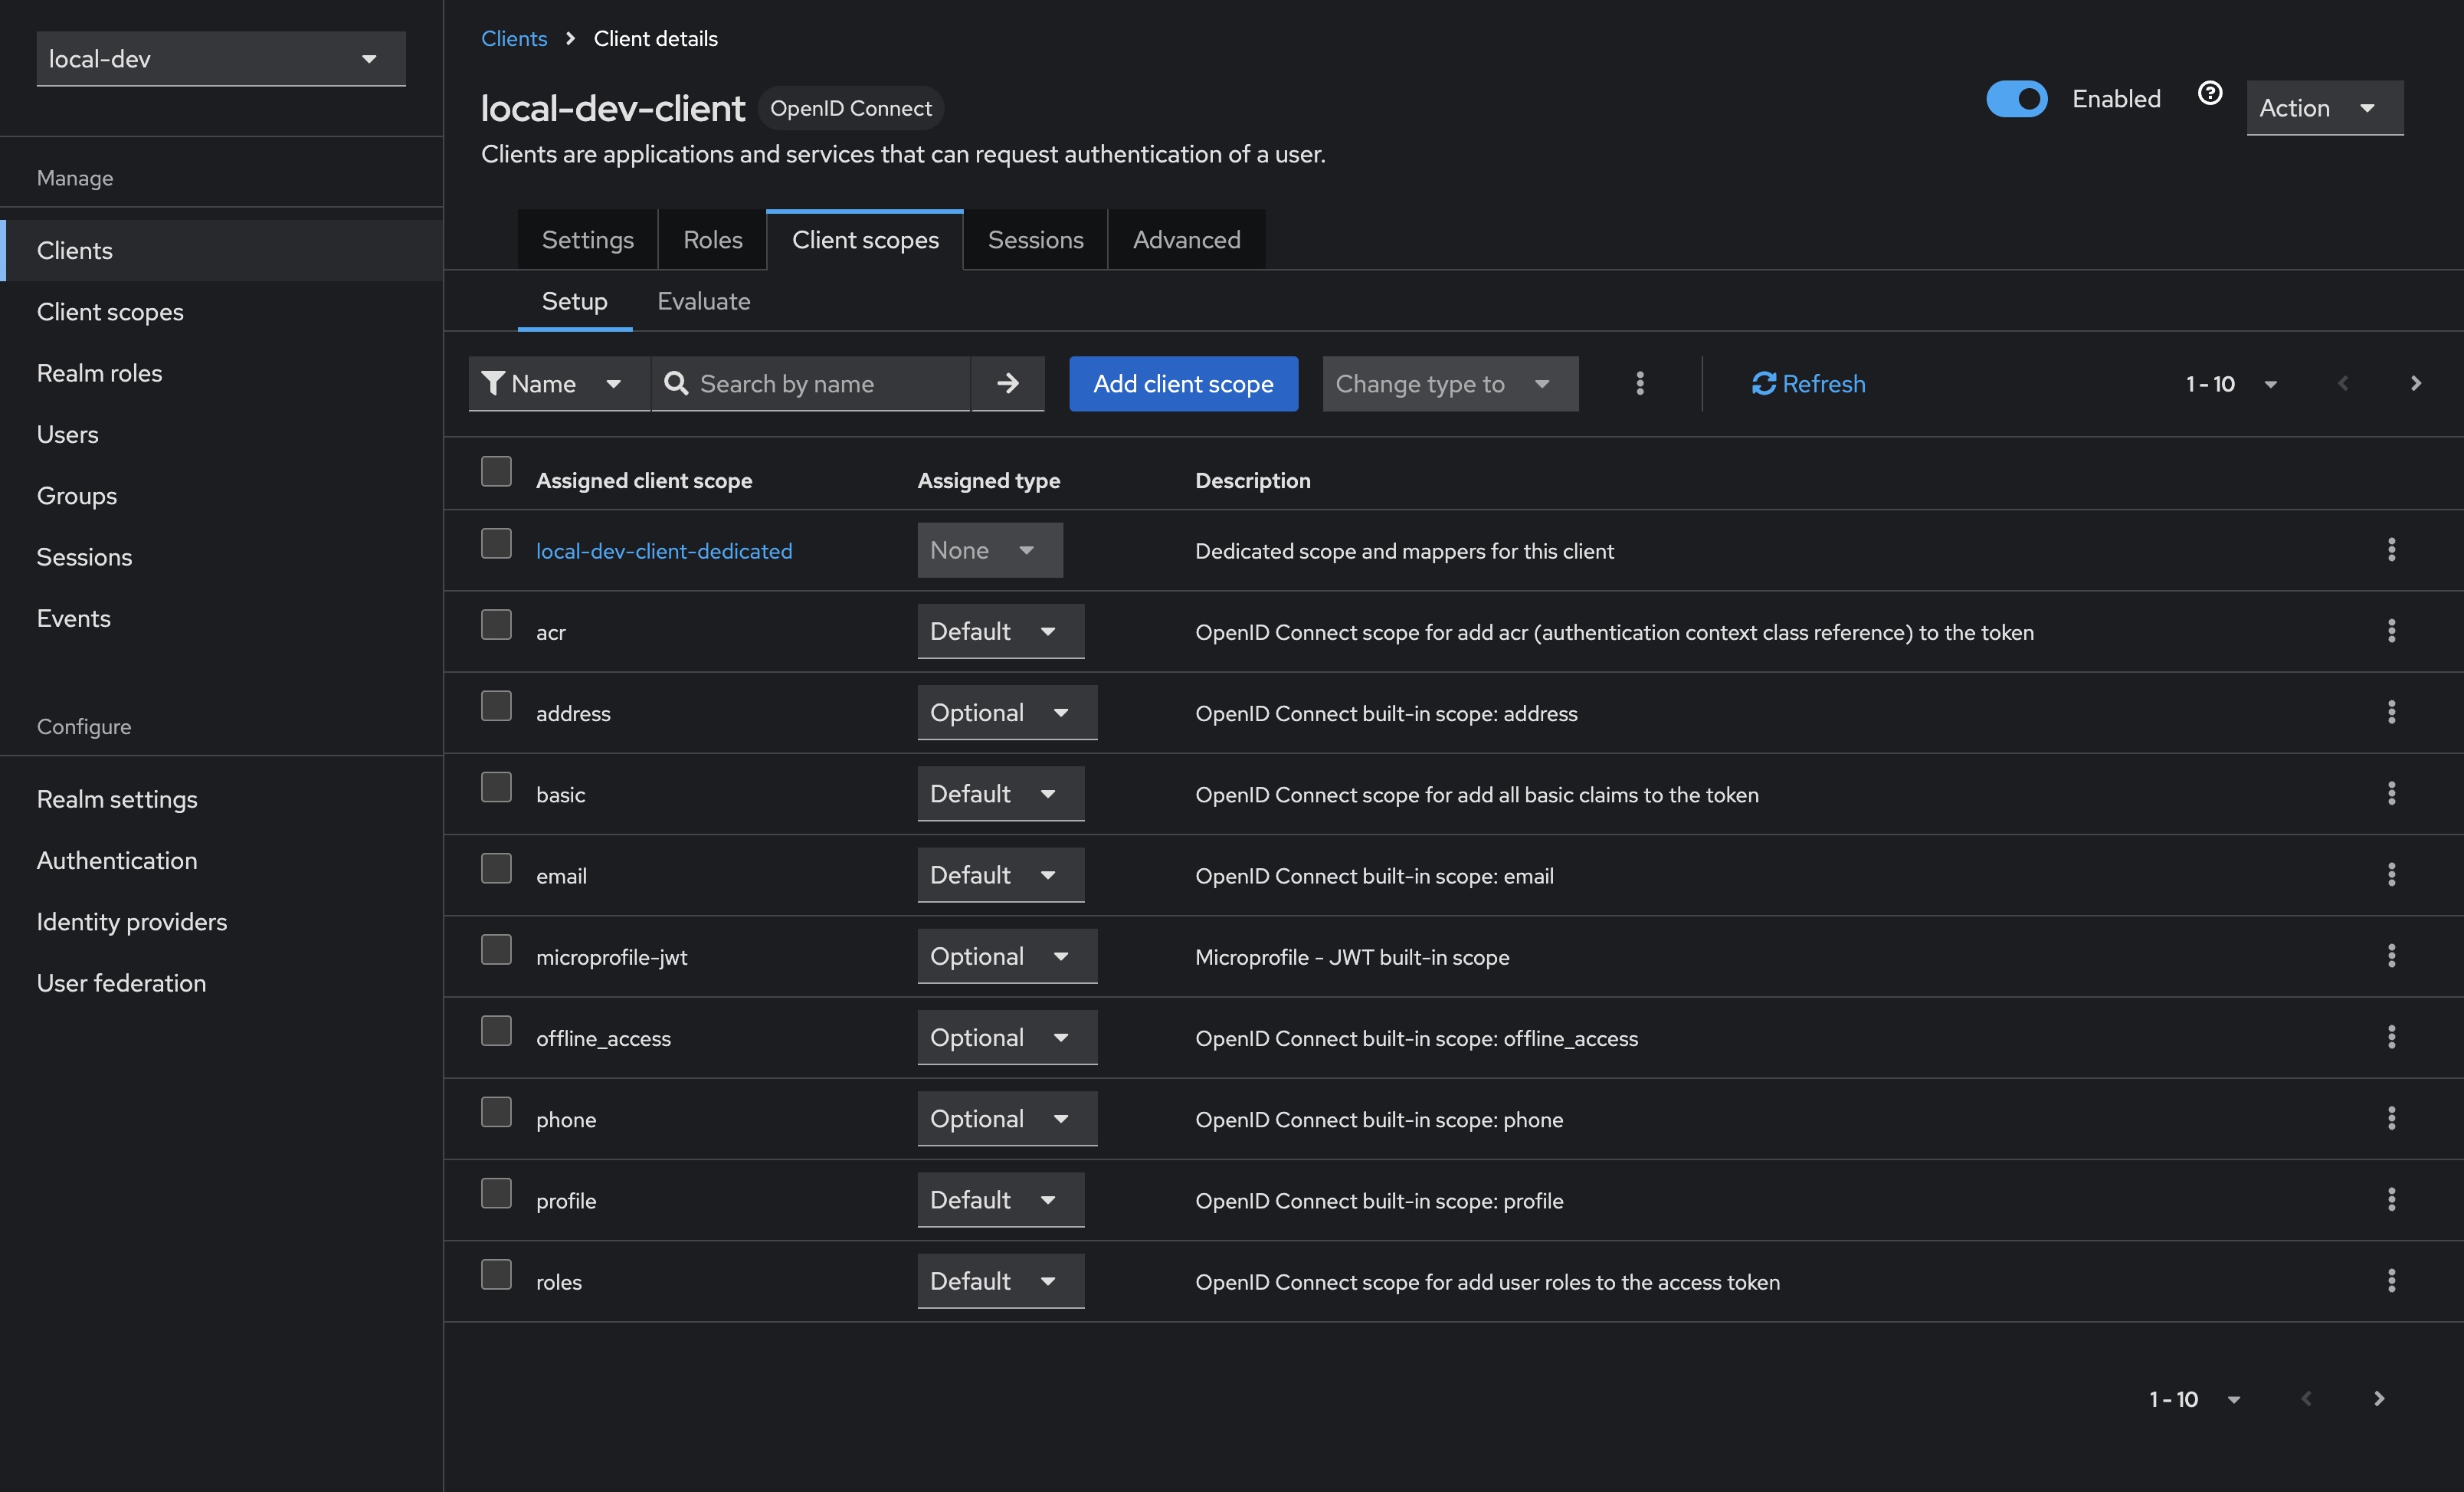
- Select Clients in the sidebar, select our newly created client
local-dev-client, then select Client scopes from the tabs along the top - Select the Assigned client scope named
<client-id>-dedicated, in our caselocal-dev-client-dedicated - Click the Add mapper button, and select By configuration
- Select Audience from the list of options, and then configure as per below
- Name can be whatever you choose, I’ve gone with
audiencehere - Selecting Included Client Audience will open a dropdown; select the newly created client
local-dev-client
- Name can be whatever you choose, I’ve gone with
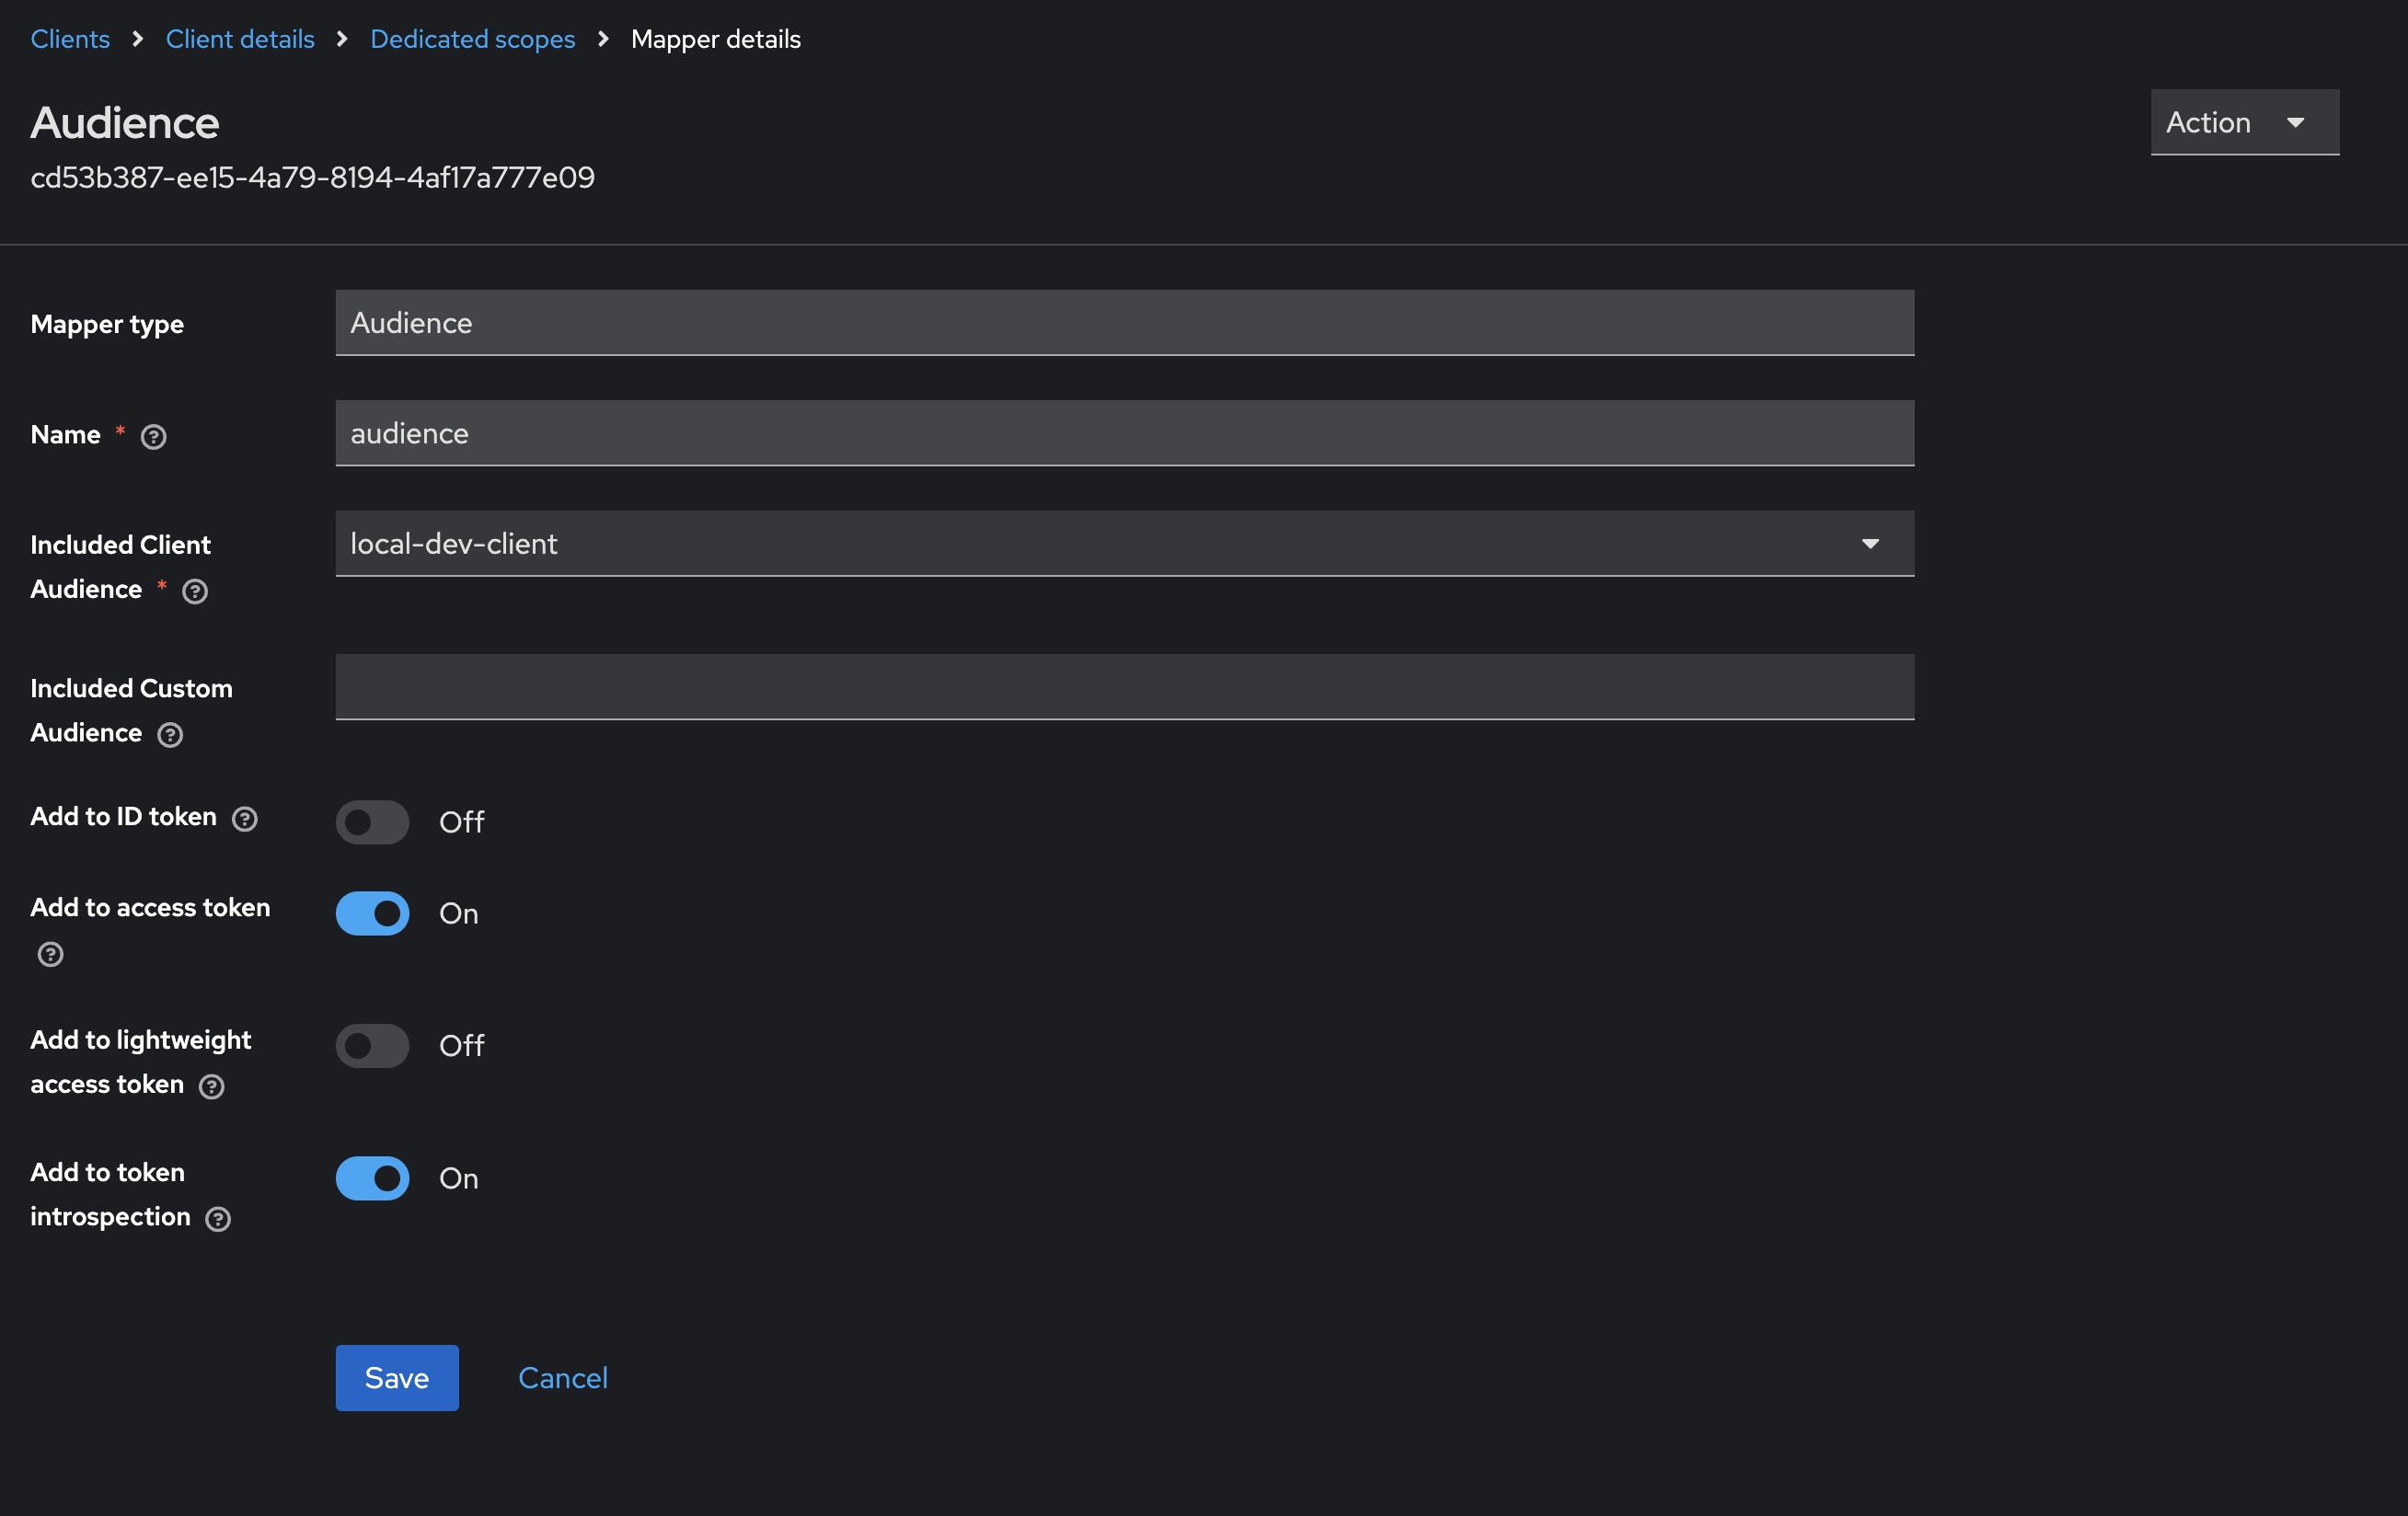
This should finish configuring our client to correctly populate the audience claim in any generated tokens.
Persisting Keycloak configuration
Of course, once we tear down our Docker container we lose any of the previously configured values. Docker volumes provide a nice solution here, which we can easily configure using docker-compose.
Save the following as docker-compose.yml and run by calling docker-compose up -d in your terminal.
| |